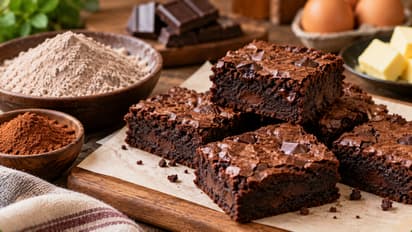
Learn how to make delicious chocolate ragi brownies at home with this easy recipe. Discover the ingredients, simple baking steps and tips for making soft, fudgy brownies using ragi flour for a tasty twist on a classic dessert.
Chocolate Brownies Made With Ragi Flour Without Maida!
Chocolate brownies usually bring maida, butter, and sugar to our minds. You can actually bake a delicious brownie using ragi flour instead of maida. The unique taste of ragi flour mixes with the chocolate flavour to give you a very different dessert.
You cannot just swap maida with the exact same amount of ragi flour. The brownie will become dry and hard if you use too much flour. You must keep the chocolate and butter measurements perfect and use less flour to get a soft and fudgy brownie.
These measurements will help you make 9 small brownie pieces in a 7-inch square baking pan.
Main ingredients:
Ragi flour – 60 grams
Dark chocolate – 100 grams
Butter – 80 grams
Sugar – 100 grams
Eggs – 2
Cocoa powder – 15 grams
Vanilla essence – 1 teaspoon
Salt – 1/4 teaspoon
You can add 30 grams of chocolate chips if you like. The brownie will taste sweeter if you use milk chocolate instead of dark chocolate. You should reduce the sugar quantity if you do that.
Important tip: You should weigh exactly 60 grams of ragi flour on a weighing scale instead of pressing it tightly into a cup. You can control the moisture and softness of the brownie only if the flour measurement is perfect.
You must first preheat your oven to 170 degrees Celsius. You need to spread butter paper inside a 7-inch square baking pan. You must ensure the paper covers the bottom and the sides so that you can easily take out the baked brownie.
You should take a bowl and melt 100 grams of dark chocolate and 80 grams of butter by placing it over another bowl of hot water. You can remove the bowl from the stove once the chocolate melts completely and let it cool for some time. The mixture can stay warm, but it should never be too hot.
You need to mix two eggs and 100 grams of sugar thoroughly in a separate bowl. You can then add vanilla essence and slowly mix the warm chocolate batter into it. You should not rush this step because the eggs might curdle if the chocolate mixture is too hot.
You must sift 60 grams of ragi flour, 15 grams of cocoa powder, and 1/4 teaspoon of salt together. You should add this dry mix to the egg and chocolate batter in two parts and fold it gently until the flour disappears. You can also add 30 grams of chocolate chips right now if you want.
You must never beat this batter for a long time like a regular cake batter. You should stop mixing once all the ingredients come together. You must not add water or milk immediately even if the batter looks very thick. A brownie batter naturally looks thicker than a normal cake batter.
You can pour the prepared batter into the baking pan and level the top surface. You should tap the pan gently to release any large air bubbles trapped inside. You must follow the exact measurements given in this recipe because adding extra ragi flour will reduce the moisture.
You need to place the baking pan in the oven preheated to 170 degrees Celsius and bake it for 20 to 25 minutes. You should start checking the brownie after 20 minutes because heating levels change from oven to oven. The top surface should look set and the edges must look baked.
You can poke a stick in the middle to check the brownie, and it should come out with slightly wet crumbs attached to it. That is the perfect stage for a soft brownie. You must bake it for a few more minutes if the stick comes out with liquid batter. The brownie will become very dry if you bake it until the stick comes out completely clean.
You should never cut the brownie immediately after taking it out of the oven. You must let it cool in the pan for at least 30 to 45 minutes. The brownie will become firm as it cools down, and only then you can cut it into clean slices. A slightly wet center does not mean it is undercooked, but you must bake it longer if you see liquid batter or raw egg signs.
Don't Forget These Tips To Keep Your Brownies From Drying Out!
People usually make common mistakes like adding too much flour, overbaking the batter, and cutting the brownie while it is still hot. You will get a soft texture only if you keep the flour measurement strictly at 60 grams and check the baking status after 20 minutes.
You should reduce the baking time slightly next time and check your oven temperature if your brownie turns out too dry. You must bake it for a few extra minutes if the center remains liquid. You should cut the brownie only after it cools down completely. You can store it in an airtight container at room temperature for up to one day. You can keep it in the fridge for more days and heat only the required pieces before eating.
This brownie does not contain maida because we use ragi flour. You should not consider this a low-sugar or low-calorie dessert because it still has butter, sugar, and chocolate. You can easily bake a soft and chocolatey ragi brownie at home if you follow the right measurements and baking time!