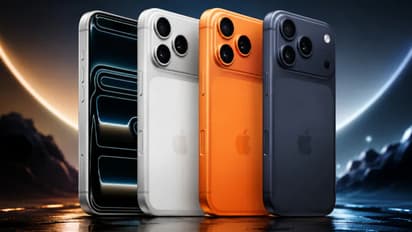
Want better photos from your iPhone? Five simple tricks involving camera settings can significantly improve your shots, from adjusting brightness to achieving professional-looking portraits.
Your iPhone packs a powerful camera. But many users never unlock its full potential. Apple designs default settings for convenience, yet a few simple adjustments to your camera's internal settings can transform everyday snapshots into truly breathtaking photos. We've compiled five essential tricks. These use often-overlooked features, giving you greater creative control and much sharper images.
26
1. Fine-Tune Your Exposure for Perfect Brightness
Want better photos instantly? Take control of your exposure. Your iPhone's auto-exposure usually works, but it struggles in tough light — think bright backlighting or dim scenes. Don't let your iPhone guess. Tap the screen where you want focus, then slide your finger up or down on the sun icon that appears. Sliding up brightens the image; sliding down darkens it. This adjustment ensures perfectly lit subjects, preventing blown-out highlights or lost shadow detail. It creates a balanced image.
36
2. Enable Grid Lines for Superior Composition
How do pros get those perfectly balanced, engaging shots? The secret: basic compositional techniques. Your iPhone makes them easy with the 'Grid' feature. To enable this tool, go to Settings > Camera. Toggle 'Grid' to on. Immediately, a nine-square grid appears over your camera's live view.
3. Lock Focus and Exposure (AE/AF Lock) for Sharp Consistency
A playful pet, a child on the move — you shoot a quick series. Then you find each photo has different focus or brightness. This inconsistency ruins a great moment. Here's trick three for better photos: use the AE/AF Lock feature. AE/AF? That's Auto Exposure/Auto Focus. Lock it for precise control.
How to activate it? Tap and hold your finger on the screen. Pick the spot for focus and exposure. A yellow 'AE/AF Lock' banner appears at the top. Now, reframe your shot. Or let the light subtly change. Your iPhone maintains that exact focus and exposure. This keeps every photo in a sequence sharp and perfectly exposed, preventing unwanted blur or distracting brightness shifts.
56
4. Master Portrait Mode for Professional Depth
Want truly striking photos of people, pets, or objects? Portrait Mode changes the game. Many modern iPhone models offer this feature. It uses computational photography to simulate the shallow depth of field DSLR cameras and specialized lenses typically achieve. It artfully blurs the background — that's 'bokeh'. Suddenly, your subject pops with a professional depth effect.
66
5. Maximize Detail with ProRAW or 48 Megapixels
Serious about top-quality, editable photos? Newer iPhone Pro models offer advanced capture formats: Apple ProRAW and 48 Megapixels. Unlock this capability: navigate to Settings > Camera > Formats. There, enable 'Apple ProRAW' or set Photo Mode to '48 MP' for compatible devices.
These settings capture far more image data than standard JPEGs. A 48-megapixel image, for example, provides immense detail. You can crop extremely without quality loss, or produce stunning large prints. Apple ProRAW, on the other hand, combines a standard RAW file's info with Apple’s computational photography. This offers unparalleled flexibility for post-capture editing. You can adjust white balance, exposure, shadows, and highlights with professional precision in editing apps — rescuing otherwise lost details. This is the ultimate trick. Photographers get maximum control, with the potential to turn good images into extraordinary ones.