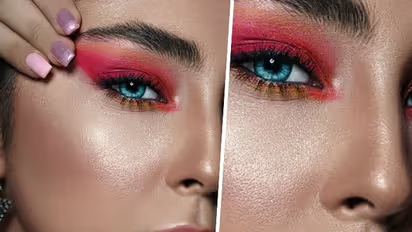
Eye make up: Step-by-step guide to mastering the Halo Eye look

Synopsis
Learn how to create a captivating halo eye look with this step-by-step guide. Discover the art of blending complementary eyeshadows to achieve a mesmerizing and glamorous appearance that will leave your eyes looking bigger and more alluring.
The halo eye look is a popular and glamorous makeup technique that accentuates your eyes, making them appear larger, brighter, and more captivating. This alluring style involves creating a subtle halo effect around the center of your eyelids, emphasizing your eye's natural beauty and giving it a mesmerizing depth. Whether you're a makeup novice or a seasoned enthusiast, follow this step-by-step guide to achieve a flawless halo eye look that will leave everyone around you in awe.
Step 1: Gather Your Tools and Products
Before diving into the creative process, ensure you have the necessary tools and products at hand. You'll need an eyeshadow primer, a matte transition shade, two complementary eyeshadows for the halo effect (one darker and one lighter), a small blending brush, a flat eyeshadow brush, eyeliner (optional), and mascara.
Also Read | Stay Hydrated and Healthy: 6 remarkable health benefits of Cucumbers
Step 2: Prep Your Eyelids
Start by prepping your eyelids with an eyeshadow primer or a dab of concealer. This will create a smooth canvas for your eyeshadows, help them stay in place, and intensify their colors.
Step 3: Apply the Transition Shade
Take the matte transition shade on your blending brush and sweep it across your crease in back-and-forth motions. This shade should be a few shades darker than your natural skin tone. The transition shade softens the contrast between your natural skin tone and the eyeshadows, ensuring a seamless blend.
Also Read | 10 reasons YOU should go for morning walks
Step 4: Create the Halo Effect
Using the darker eyeshadow shade, apply it to the outer and inner corners of your eyelids, leaving the center of the lids free. Imagine drawing a sideways V or a crescent shape on the outer and inner corners. The halo effect can be as subtle or as bold as you prefer, depending on the intensity of the eyeshadow you choose.
Step 5: Blend the Edges
Take your blending brush again and softly blend the edges of the darker eyeshadow into the transition shade. The key is to create a smooth gradient without harsh lines. Be patient and use light, circular motions to achieve a seamless blend.
Also Read | Nourish Your Skin Naturally: 7 skin-boosting Vegetables for a radiant glow
Step 6: Apply the Lighter Eyeshadow
Now, pick up the lighter eyeshadow shade and carefully pat it onto the center of your eyelids using a flat eyeshadow brush. This will make the center of your eyelids pop, creating a halo effect with the darker shades surrounding it.
Step 7: Blend and Soften
With the blending brush, gently blend the edges where the lighter and darker eyeshadows meet. This step is crucial to ensure a harmonious transition between the two shades and to avoid any harsh lines.
Also Read | 10 architectural marvels around the world you MUST visit
Step 8: Optional Eyeliner and Mascara
For added drama, apply eyeliner along your upper lash line and your waterline. If you prefer a softer look, you can skip the eyeliner altogether. Complete your halo eye look with a few coats of mascara to define and lengthen your lashes.
Step 9: Finishing Touches
To enhance the overall appearance, highlight your brow bone and inner corner of your eyes with a light, shimmery eyeshadow or a highlighter. This will add dimension and brightness to your halo eye look.
In conclusion, creating a halo eye look is a fun and rewarding makeup technique that can elevate your eye makeup game. With a bit of practice and the right tools, you can achieve a captivating and stunning halo effect that will leave you feeling like a beauty pro. So, gather your makeup brushes and get ready to flaunt your beautiful, haloed eyes to the world!
Explore the latest Lifestyle News covering fashion, wellness, travel, Food and Recipes, and more. Stay updated with trending Health News, fitness tips, and expert insights to inspire your daily living. Discover personalized lifestyle trends that keep you stylish and informed. Download the Asianet News Official App from the Android Play Store and iPhone App Store for everything that adds value to your everyday life.